Casio CTK-2000 Bedienungsanleitung Seite 12
- Seite / 27
- Inhaltsverzeichnis
- LESEZEICHEN
- CTK-2000 1
- CONTENTS 2
- SPECIFICATIONS 3
- BLOCK AND WIRING DIAGRAM 4
- PCB LAYOUT 5
- CIRCUIT DESCRIPTION 6
- PRINTED CIRCUIT BOARDS 7
- Key PCB M800-KYA1 9
- Key PCB M800-KYA2 9
- DISASSEMBLY 10
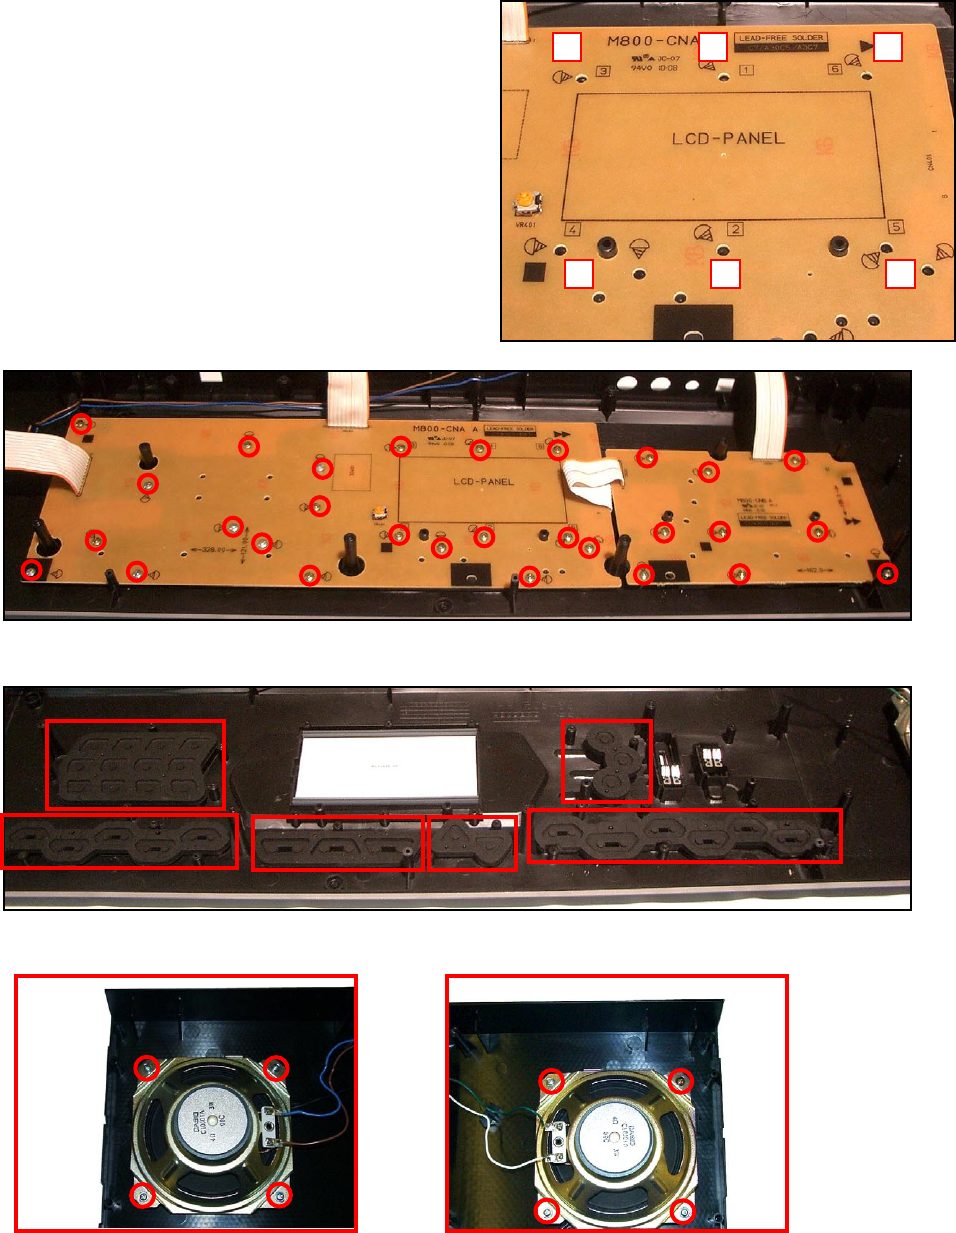
- 9. Remove the rubber keys 12
- 4 25 3 1 14
- DIAGNOSTIC PROGRAM 15
- EXPLODED VIEW 18
- PARTS LIST 19
- 2 CTK-2000_CHINA 20
- 3 CTK-2000_EU 20
- 4 CTK-2000_UK 20
- 5 CTK-2000_US 20
- 1 CTK-2000_DI 20
- SCHEMATIC DIAGRAMS 22
- Sub PCB M800-PSA1 23
- Console PCB M800-CNA 24
- Console PCB M800-CNB 25
- Keyboard PCBs M800-KYA1/KYA2 26
- CASIO COMPUTER CO.,LTD 27
Verwandte Produkte und Handbücher für Digitale Klaviere Casio CTK-2000
 (26 Seiten)
(15 Seiten)
(132 Seiten)
(26 Seiten)
(15 Seiten)
(132 Seiten)
 (16 Seiten)
 (54 Seiten)
 (33 Seiten) (132 Seiten)
 (44 Seiten)
 (26 Seiten)
© 2020, manymanuals.de. Alle Rechte vorbehalten. | 0.057 s |
 Manymanuals.com
 Manymanuals.de
 Manymanuals.fr
 Manymanuals.it
 Manymanuals.pl
 Manymanuals.cz
 Manymanuals.es
 Manymanuals-pt.com
Kommentare zu diesen Handbüchern